
- OpenCart 3.0
- E-invoices with customer, VAT and payment already filled in
- €50 one-off, no subscription
Why a ready-made module
You could write a connection between OpenCart and Fatture in Cloud from scratch, perhaps with help from an AI. But that means studying the Fatture in Cloud API, creating or updating the customer on every order, matching tax rates and payment methods, filling in recipient code and PEC for Italian e-invoicing, making the totals add up with OpenCart shipping, discounts and rounding, and then reworking everything at every update.
The module already does all of this. You upload it to the store, connect it to Fatture in Cloud in a few minutes, and from then on you choose the orders and click Esporta, and the invoices appear in Fatture in Cloud already complete, with the number of each one visible from the store. If something does not add up, the person who wrote it answers you, with 3 months of support included.
What it does
- Sends OpenCart orders to Fatture in Cloud as an e-invoice, invoice, receipt, delivery note, work report, order, pro forma, quote or credit note.
- Creates the customer in Fatture in Cloud or updates it if it already exists, with VAT number, tax code, recipient code and PEC taken from the custom fields you choose.
- Matches OpenCart tax rates to Fatture in Cloud ones, and payment methods to the e-invoice payment mode and the account.
- Exports the orders in a range of dates or order numbers and keeps the list of the documents created, which you can delete from the store only or from Fatture in Cloud too.
What you need
- A Fatture in Cloud account.
- OpenCart 3.0 with VQMod installed.
- The module, €50 one-off with 3 months of support and a refund within 60 days. It is also available for PrestaShop and Magento.
Installing the module
- 1
Copy the files
Extract the zip you downloaded after your purchase and copy the contents of the
uploadfolder into the OpenCart root folder. VQMod is needed, so if the store does not have it, install it first. - 2
Grant the permissions
In System › Users › User Groups edit your group, usually Administrator, and tick under Access and Modify the entries
fattureincloud/fattureincloud_export,fattureincloud/payment,fattureincloud/taxesandextension/module/fattureincloud_export. Then in Extensions › Extensions › Modules install FattureinCloud Esporta Documenti with the green button. - 3
The licence is already there
If you bought the module on this website, the licence for the domain you entered in the order is activated automatically when the order is completed. You can add a test domain in the same order, before putting the module in the cart.
Connecting Fatture in Cloud
You connect it once and there is nothing technical to write, you just copy a code from one page to another. The settings open with the pencil next to FattureinCloud Esporta Documenti, in Extensions › Extensions › Modules.
- 1
Open the connected applications
At the top of the configuration you find the Applicazioni collegate a Fatture in Cloud link and the ID Cliente of our application. The link opens the right Fatture in Cloud page, where you click Ottieni il tuo token personale.

The «Applicazioni collegate» page in Fatture in Cloud, with the button for getting the token. - 2
Enter the client ID, choose the company and the permissions
Paste the ID Cliente shown by the module and click Prosegui. Tick the company that should receive the documents, then give Accesso completo to Clienti and to the documents you want to create, for example Fatture, and Lettura to Impostazioni, which the module needs to read VAT rates, payment methods and accounts.
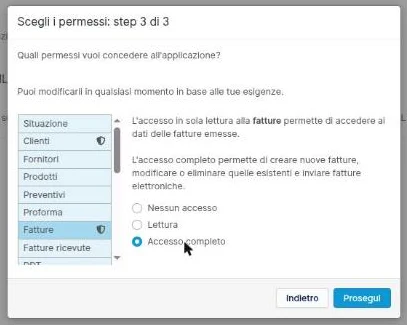
The shield next to an item means the permission is granted. - 3
Copy the token
Fatture in Cloud shows you the access token. Copy it with the icon next to it and keep it to yourself, because it is the key to your account.
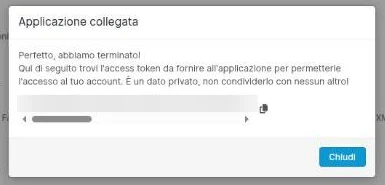
The token, hidden in the screenshot, is copied with the icon on the right. - 4
Paste it into OpenCart
In the Dati d'accesso (access details) tab paste the token into Token di accesso and save with the blue button. Open the configuration again and the Azienda drop-down now shows your Fatture in Cloud companies. Choose the right one and save again.
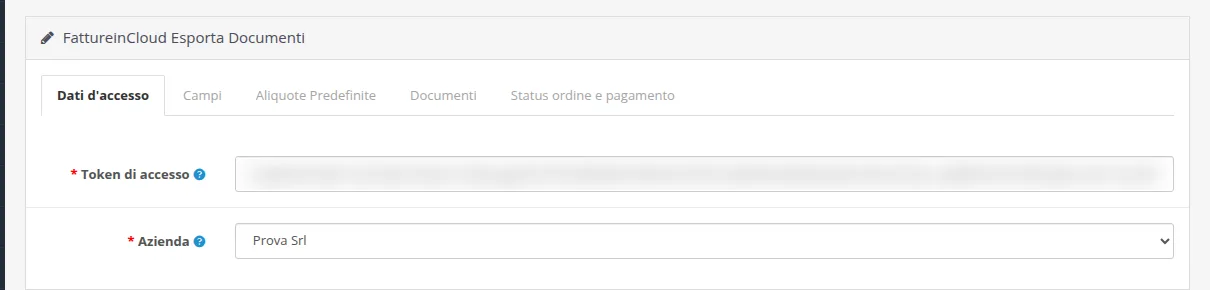
Token saved, hidden in the screenshot, and company chosen.
Configuring the module
- 1
Fields
In the Campi (fields) tab you choose which OpenCart custom fields hold VAT number, tax code, PEC and SDI code. If the store does not have them, you create them in Customers › Custom Fields and then choose them here.
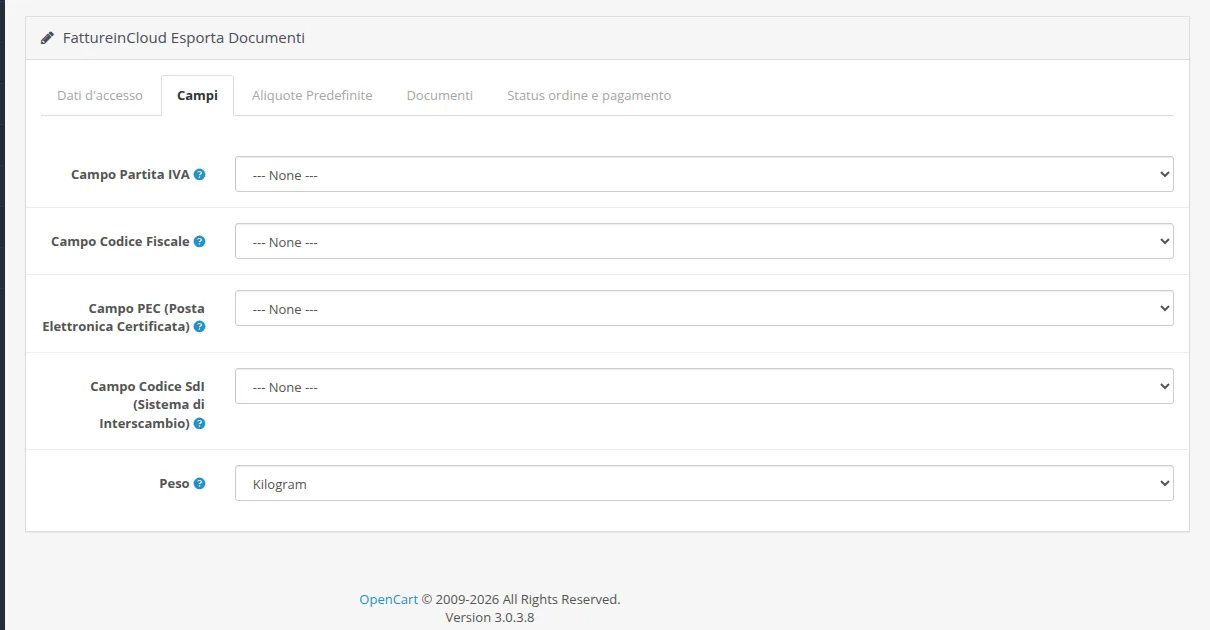
Each e-invoicing detail comes from a customer field. - 2
Default VAT rates
In the Aliquote Predefinite (default VAT rates) tab you set which OpenCart tax class to use for customers in Italy, in the European Union and outside it, and which geo zone represents the European Union.
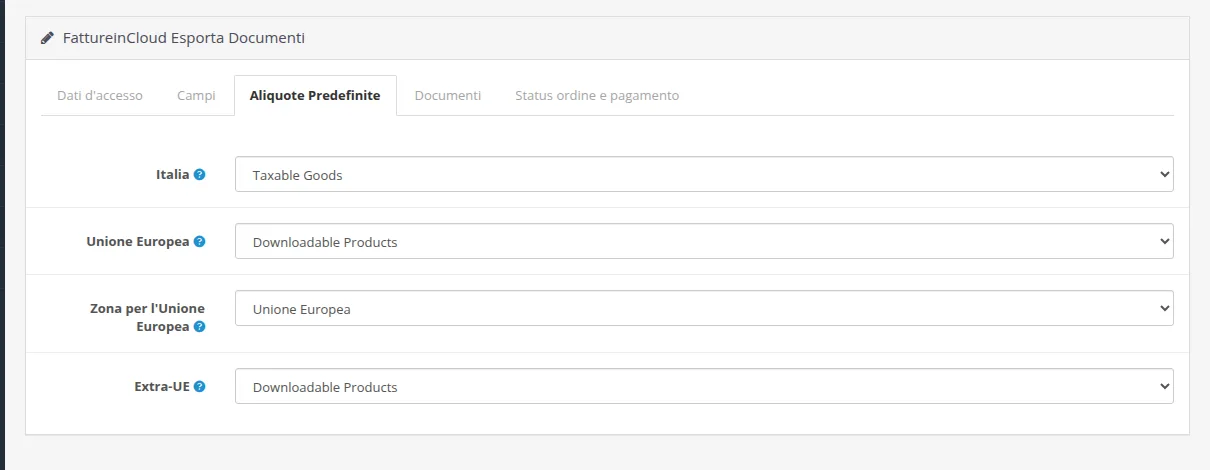
Italy, European Union and outside the EU. - 3
Documents and statuses
In the Documenti tab you choose the type, for example Fattura elettronica, the numbering series and the subject text with placeholders such as
{numero}and{data}. In the Status ordine e pagamento (order and payment status) tab you choose which statuses to export and which mark the invoice as paid.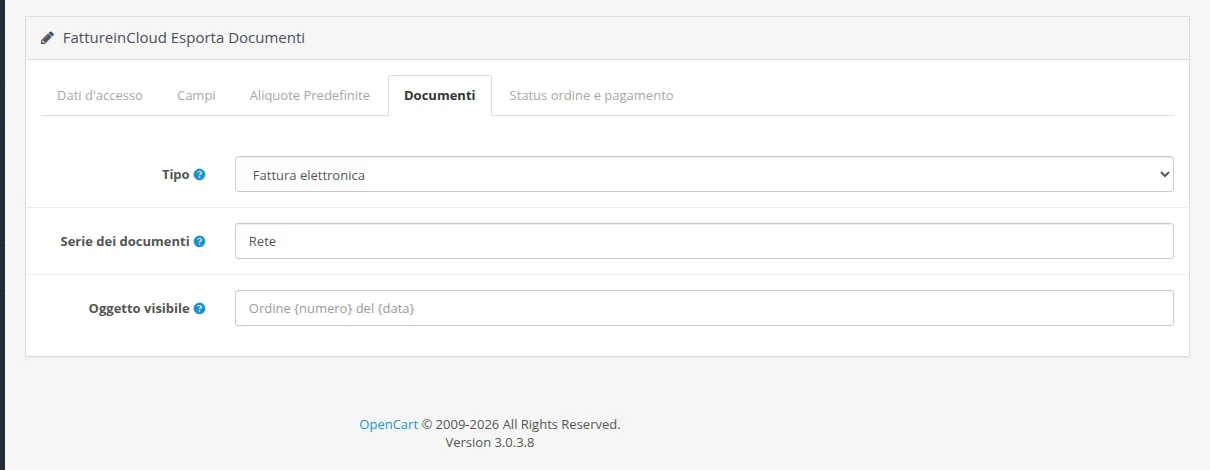
Document type, series and subject. 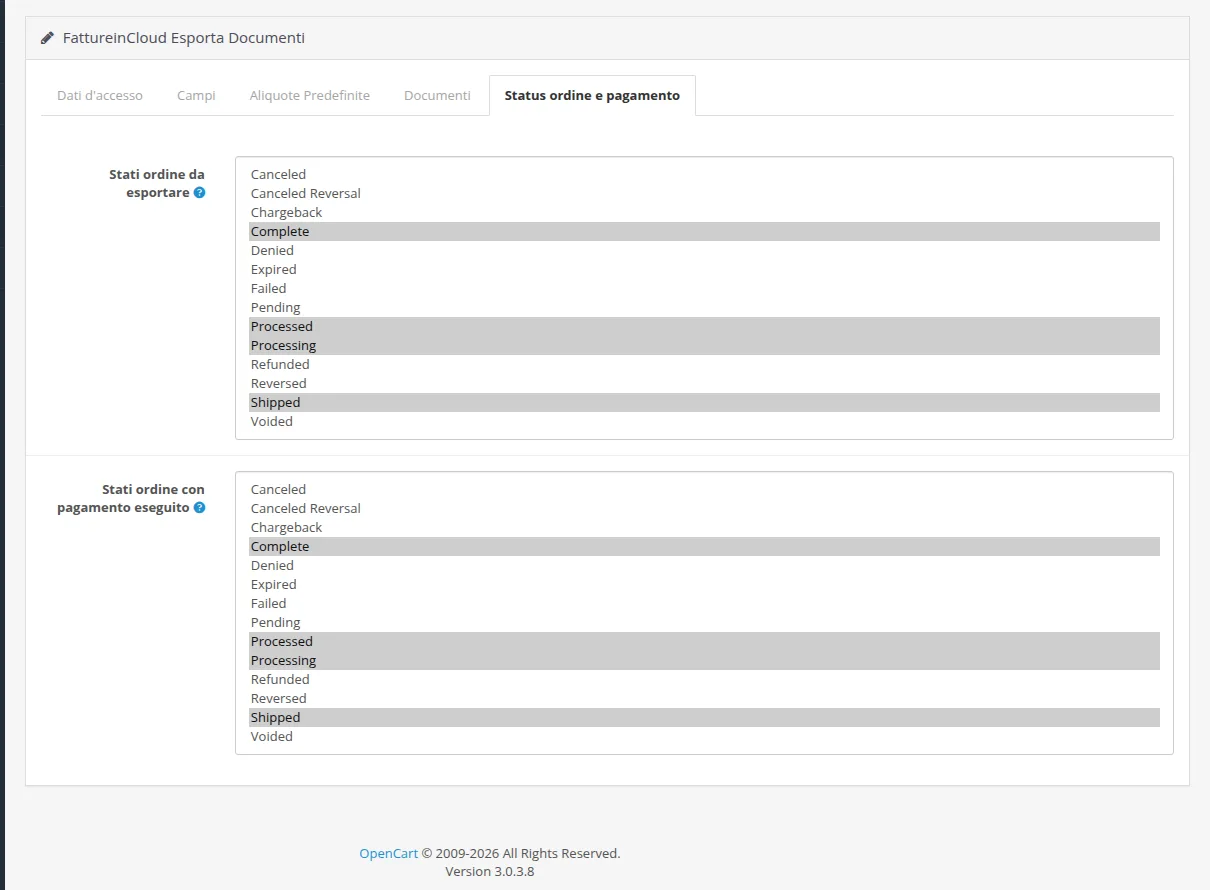
The chosen statuses are in grey. To choose more than one hold Ctrl. - 4
Payment methods
In FattureinCloud › Tipi Pagamento match each OpenCart payment method to the Fatture in Cloud method, the e-invoice payment mode and the account. For e-invoices you need a match for every payment method you use.
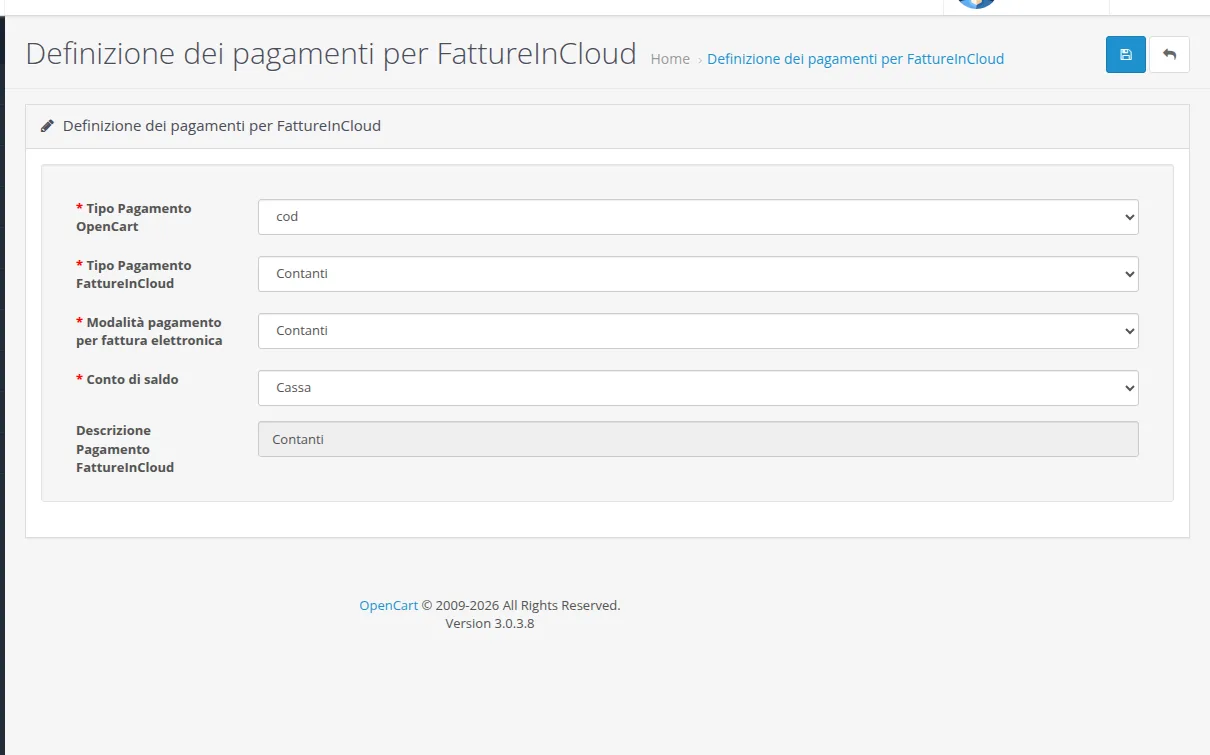
OpenCart's cash on delivery paid in cash, on the «Cassa» account. - 5
VAT categories
In FattureinCloud › Categorie IVA match each OpenCart tax rate to the Fatture in Cloud one, for example a 22 % VAT to «22 %».
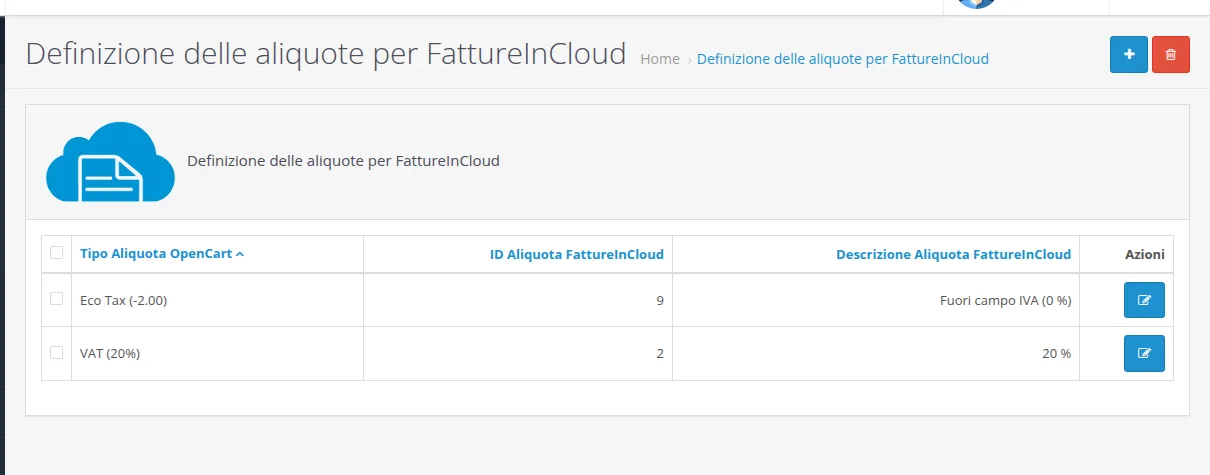
One match for each tax rate you use in the store.
Sending orders to Fatture in Cloud
- 1
Choose the orders and export
In FattureinCloud › Invia Fatture choose the document type and, if you want, a range of dates or order numbers, then click Esporta. Every exported order appears in the list with the number of the document in Fatture in Cloud, and from here you can delete it from the store only or from Fatture in Cloud too.
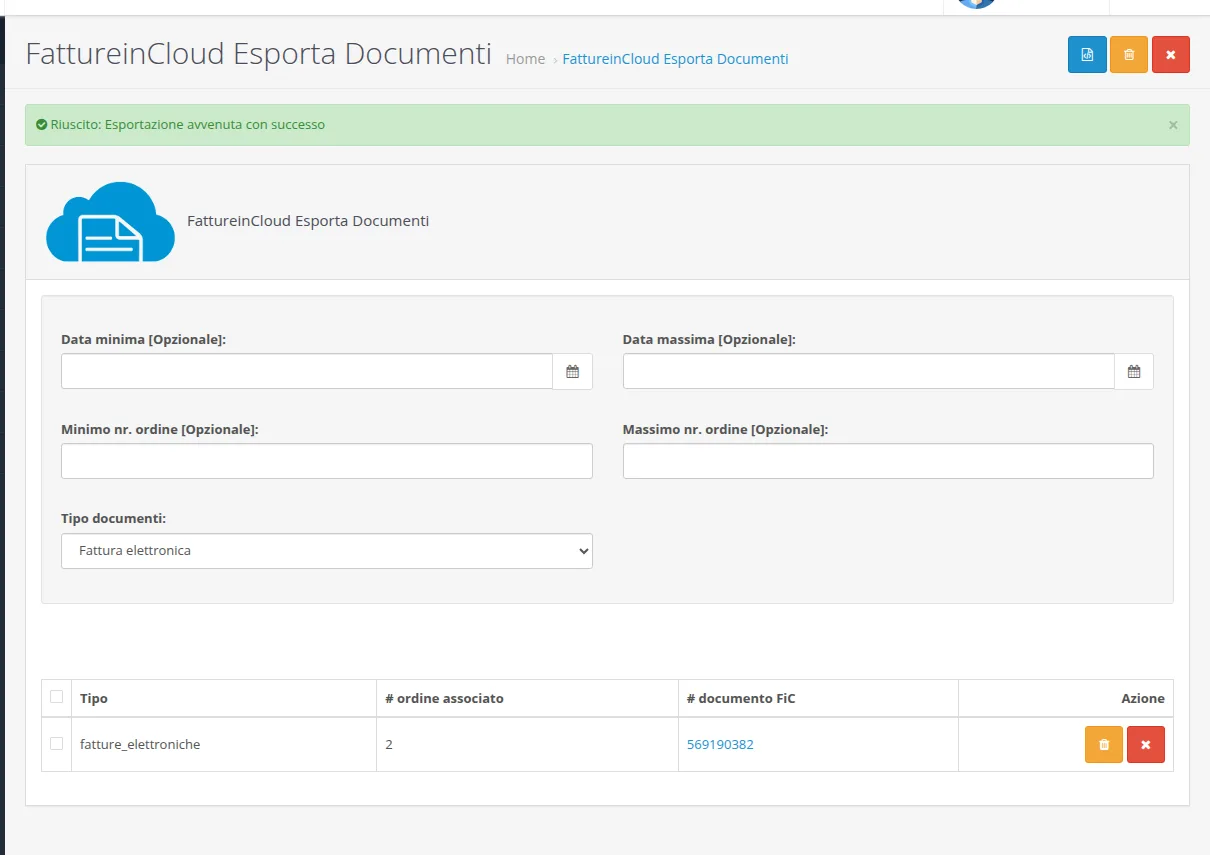
Order 2 of the test store, now e-invoice 569190382. - 2
Find the invoice in Fatture in Cloud
In Fatture in Cloud the invoice is already complete with customer, products, VAT and due date, and all that is left is to sign it and send it to the Italian exchange system with Firma e invia.
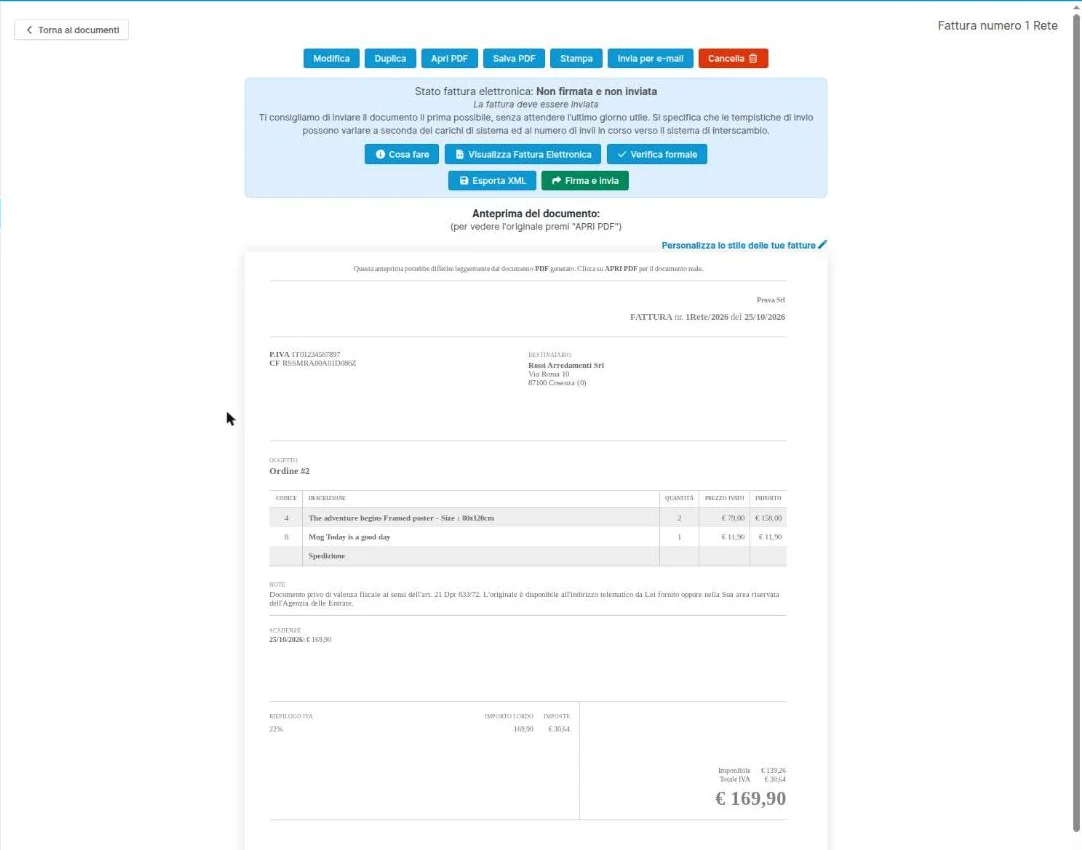
The invoice created from the order, ready to be signed and sent.
If something goes wrong
The module pages do not open or say a permission is missing
The user group permissions are missing, or VQMod is not installed. Check the four entries in System › Users › User Groups and that VQMod works.
«Risulta non assegnata una modalità di pagamento per la fattura elettronica»
The order payment method is not matched. Open FattureinCloud › Tipi Pagamento and add the match for that method, with the e-invoice payment mode and the account.
The VAT rate or payment drop-downs are empty
The application lacks read permission on Impostazioni. In Fatture in Cloud open Impostazioni › Applicazioni collegate, open the application and add it to the permissions.
The Azienda drop-down shows nothing
The token was not saved or is no longer valid. Paste it again in Dati d'accesso and save. If you regenerated it in Fatture in Cloud, paste the new one.
An order does not go out
Its status is not among the ones to export. Add it in the Status ordine e pagamento tab and try again.